Template:P5635 Installation Instructions: Difference between revisions
Jump to navigation
Jump to search
IVSWikiBlue (talk | contribs) |
IVSWikiBlue (talk | contribs) No edit summary |
||
| Line 1: | Line 1: | ||
==Installation Instructions== | |||
''Note:'' There is no need to disassemble the 5635 camera. | |||
===Mounting the Camera=== | |||
#Locate the network drop above the ceiling either being a male Ethernet end (service loop) or a biscuit jack. This will have been ran back to the POE switch. | |||
#: ''Note:'' If the switch does not have POE, a POE injector will need to be installed at the network closet. | |||
#Remove Axis T94A02L kit from packaging. This will include the mounting bracket and the camera dome ring. | |||
#Determine the location where the 5635 will be mounted and remove the ceiling tile | |||
#Measuring the ceiling mount bracket, note that there is a slight lip to the camera mount | |||
#: [[File:5635ceiingMount1.jpg|link=https://ipivs.com/wiki/images/2/29/5635ceiingMount1.jpg]] | |||
#Find center of the ceiling tile and using a pencil, draw a circle approximately nine inches in diameter | |||
#Using a drywall saw, cut out the section of ceiling tile where the mount will be inserted | |||
#: [[File:5635CelingMountInstalled.jpg|link=https://ipivs.com/wiki/images/6/61/5635CelingMountInstalled.jpg]] | |||
#Using a T20 bit, tighten the mounting arms of the ceiling mount | |||
#: [[File:5635celingMountArm.jpg|link=https://ipivs.com/wiki/images/8/85/5635celingMountArm.jpg]] [[File:5635celingMountArmFasten.jpg|link=https://ipivs.com/wiki/images/8/83/5635celingMountArmFasten.jpg]] | |||
#: ''Note:'' Ensure not to over tighten into the ceiling tile. | |||
#Pass the Axis MultiCable C I/O and the Ethernet cable through the hole at the top of the camera mount | |||
#: [[File:5635CamWire.jpg|link=https://ipivs.com/wiki/images/1/1f/5635CamWire.jpg]] | |||
#Connect cables to their respective ports | |||
#: [[File:5635CamWireConnect.jpg|link=https://ipivs.com/wiki/images/0/07/5635CamWireConnect.jpg]] | |||
#Before locking the 5635 to the mounting posts in the ceiling mount, ensure that the safety cable is attached to the camera | |||
#: [[File:5635safteyWire.jpg|link=https://ipivs.com/wiki/images/8/83/5635safteyWire.jpg]] [[File:5625safteyPost.jpg|link=https://ipivs.com/wiki/images/1/1a/5625safteyPost.jpg]] | |||
#Insert the camera into the ceiling mount and twist until locked in place securely | |||
#: [[File:5625CameraInstalled.jpg|link=https://ipivs.com/wiki/images/6/63/5625CameraInstalled.jpg]] | |||
#Using a T20 bit, secure the dome ring to the camera mount | |||
#: [[File:5635complete.jpg|link=https://ipivs.com/wiki/images/4/42/5635complete.jpg]] | |||
#Carefully return the ceiling tile to its location | |||
''Note:'' If not using drop ceiling, use alternate instructions inside of the box for mounting to a hard ceiling. | |||
===Connecting Wiring=== | |||
#Begin but cutting two lengths of 22/2. Ensure they are long enough to reach the microphone location. One will be for audio signal. One will be for power. | |||
#Strip the jacket off the 22/2, revealing the red, black, and common (bare wire) on both sides of the cable. | |||
#Remove the string and plastic casings covering the red and black cables. | |||
#Strip the red and black jackets off the wire exposing the copper. Cut copper evenly on both ends. Remove ground. | |||
#At the Axis MultiCable C I/O, connect the ends of 22/2 | |||
#*Audio will be connected to the "In" on the audio terminal block - Red to +, Black to - | |||
#*Power will be connected to the I/O terminal block - Red to to 2, Black to 1 | |||
#: [[File:5635MulitCableConnect.jpg|link=https://ipivs.com/wiki/images/2/2e/5635MulitCableConnect.jpg]] | |||
Revision as of 16:41, 14 May 2020
Installation Instructions
Note: There is no need to disassemble the 5635 camera.
Mounting the Camera
- Locate the network drop above the ceiling either being a male Ethernet end (service loop) or a biscuit jack. This will have been ran back to the POE switch.
- Note: If the switch does not have POE, a POE injector will need to be installed at the network closet.
- Remove Axis T94A02L kit from packaging. This will include the mounting bracket and the camera dome ring.
- Determine the location where the 5635 will be mounted and remove the ceiling tile
- Measuring the ceiling mount bracket, note that there is a slight lip to the camera mount
- Find center of the ceiling tile and using a pencil, draw a circle approximately nine inches in diameter
- Using a drywall saw, cut out the section of ceiling tile where the mount will be inserted
- Using a T20 bit, tighten the mounting arms of the ceiling mount
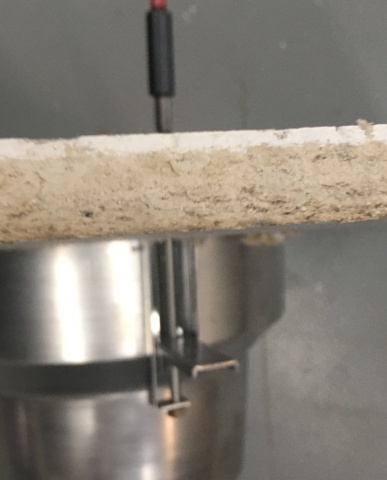
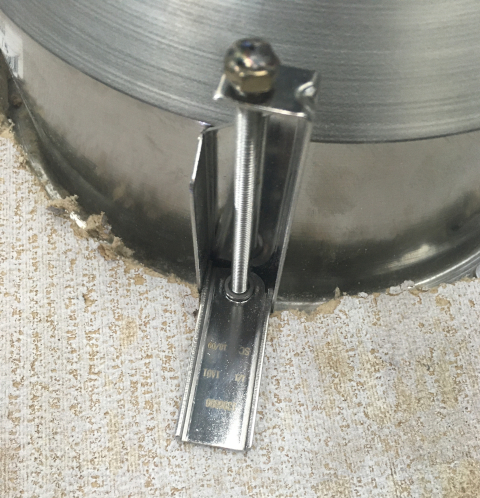
- Note: Ensure not to over tighten into the ceiling tile.
- Pass the Axis MultiCable C I/O and the Ethernet cable through the hole at the top of the camera mount
- Connect cables to their respective ports
- Before locking the 5635 to the mounting posts in the ceiling mount, ensure that the safety cable is attached to the camera
- Insert the camera into the ceiling mount and twist until locked in place securely
- Using a T20 bit, secure the dome ring to the camera mount
- Carefully return the ceiling tile to its location


Note: If not using drop ceiling, use alternate instructions inside of the box for mounting to a hard ceiling.
Connecting Wiring
- Begin but cutting two lengths of 22/2. Ensure they are long enough to reach the microphone location. One will be for audio signal. One will be for power.
- Strip the jacket off the 22/2, revealing the red, black, and common (bare wire) on both sides of the cable.
- Remove the string and plastic casings covering the red and black cables.
- Strip the red and black jackets off the wire exposing the copper. Cut copper evenly on both ends. Remove ground.
- At the Axis MultiCable C I/O, connect the ends of 22/2
- Audio will be connected to the "In" on the audio terminal block - Red to +, Black to -
- Power will be connected to the I/O terminal block - Red to to 2, Black to 1
